

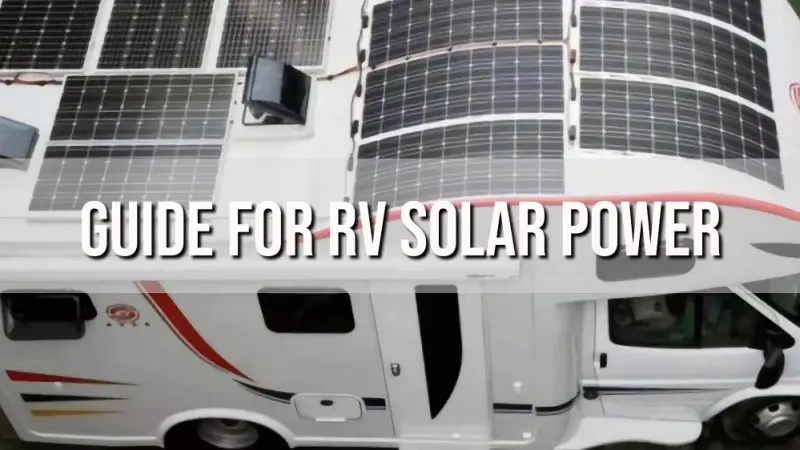
Guide For RV Solar Power – Having an independent solar power system on your RV allows you to free yourself from shore power, generate electricity silently off-grid, and extend adventures into nature. This beginner’s guide will walk you through the basics of outfitting your RV or trailer with solar power. It covers the components like solar panels, batteries and inverters that make up a solar system. You’ll learn how to install solar on your rig, tips for maintaining the system, and troubleshooting common issues that may arise. We’ll also discuss the costs versus rewards when investing in RV solar. Follow this solar power guide to start generating free, renewable electricity from the sun and gain energy independence for your RVing lifestyle. Let’s switch on your journey to harnessing the power of solar!
Key Takeaways
- Components like batteries, charge controller and inverter are also needed for a complete system.
- Carefully measure and plan your system layout and wiring for a successful install.
- Inspect panels and connections regularly. Keep batteries charged. Watch for leaks, corrosion and wear.
- RV solar pays for itself within 5 years and enhances off-grid camping capabilities.
Understanding Solar Power
Before installing solar power on your recreational vehicle, it helps to understand the basics of how solar energy systems work. Solar panels (also called photovoltaic or PV panels) convert sunlight into direct current (DC) electricity. This happens through solar cells inside the panel containing silicon semiconductors that release electrons when struck by photons from sunlight.
A typical 100 watt solar panel for RVs will contain 60 individual solar cells linked together. The released electrons flow into metal conductors to generate a DC electric current. However, appliances and electronics in your RV run on regular 120 volt alternating current (AC) like you get from shore power. This means the DC current from the solar panels needs to be converted to AC current using an inverter. Batteries are also included in the system to store excess power generated during the day, so it can be used at night when solar panels aren’t producing.
Understanding these basics of how solar panels create electricity, batteries store it, and inverters convert DC to AC will help you choose components and install your RV solar system successfully.
Why Choose Solar Power for Your RV
There are many excellent reasons to add solar power to your RV or campervan setup:
- Generate free, renewable electricity to run appliances and electronics silently while boondocking off-grid. Reduce need for noisy, expensive generator fuel.
- Charge your house battery bank using the sun’s plentiful energy so you can comfortably camp anywhere overnight or longer. Keep batteries fully charged.
- Power vent fans, lights, TV, CPAP machines and other electronics without constantly moving your rig to charge batteries.
- Use solar to prolong battery life by preventing excess discharge cycles that can damage lead-acid batteries.
- Gain energy independence with solar. Less need for hookups allows more camping flexibility and reduces campground fees.
- Solar works anywhere the sun shines! Get power boondocking on BLM land, in national forests, or wherever your travels take you.
- Greener way to RV using renewable energy that won’t discharge toxic fumes or greenhouse gases.
- Flexible modular system that can start small and be expanded over time as your needs and budget allow.
- Recharges itself silently for free every sunny day. Provides a long term economical solution with 5-15 year lifespan.
Solar energy aligns perfectly with the RV lifestyle by enabling self-sufficient off-grid travel while reducing environmental impact and saving money long term.
Components of an RV Solar Power System
A complete solar power setup for RVs requires 4 primary components working together: solar panels, charge controller, battery bank, and inverter:
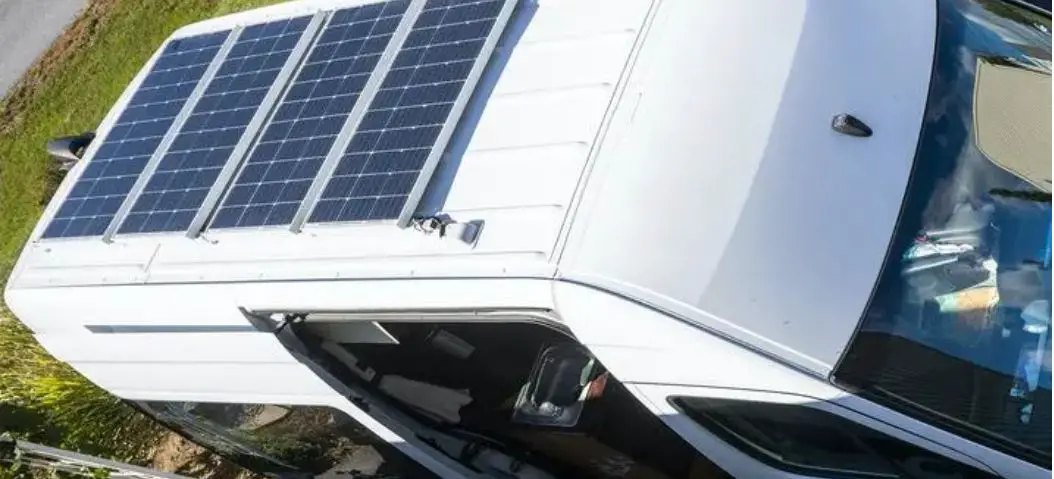
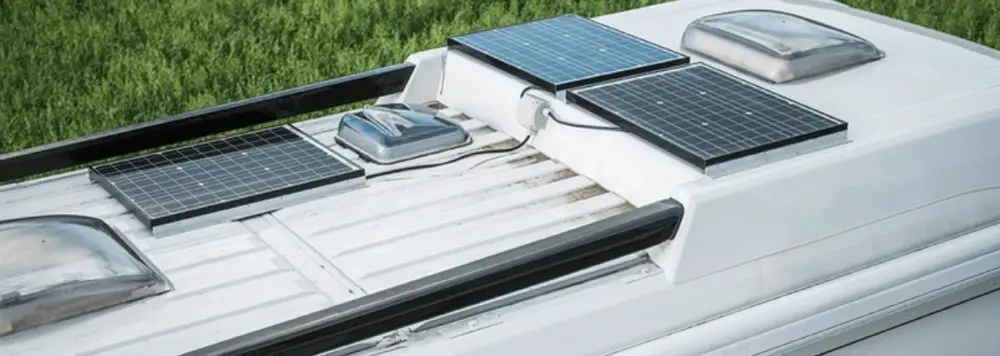
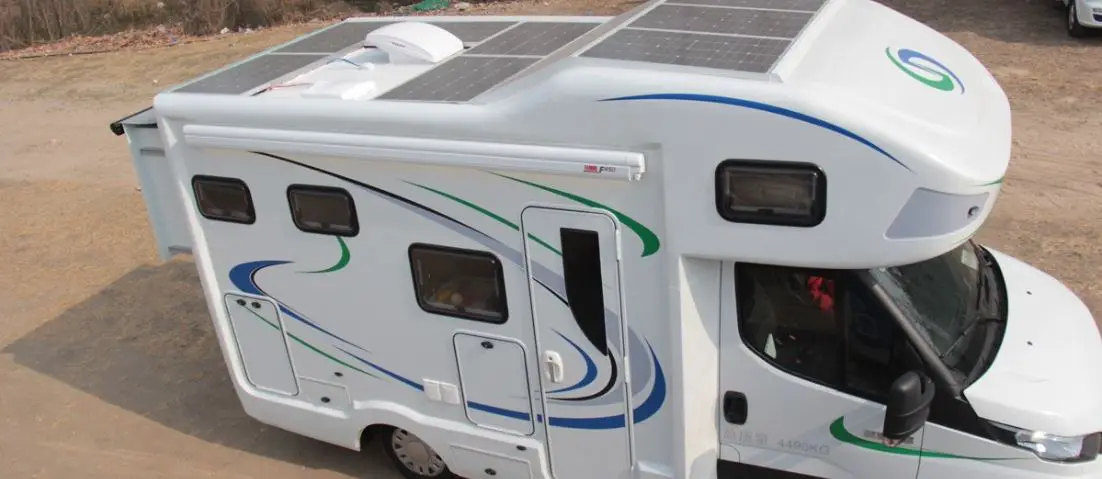
Solar Panels
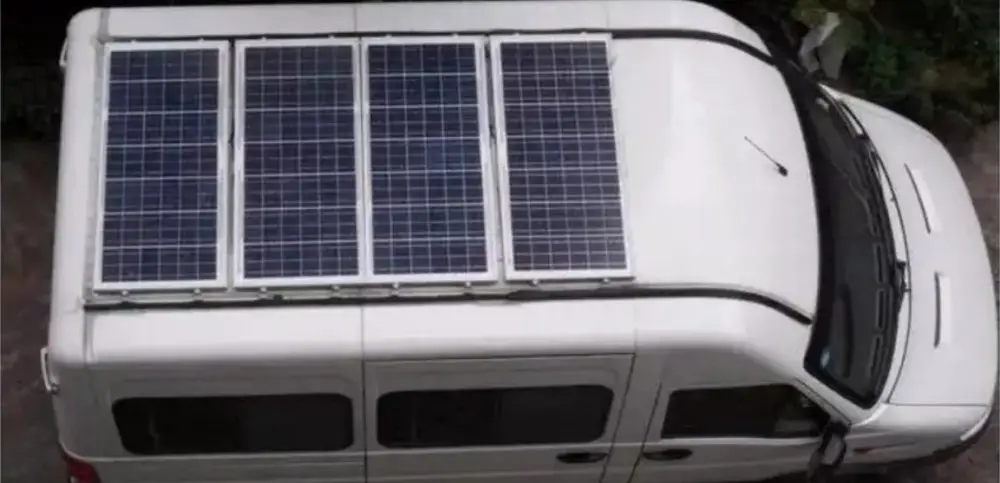
The solar panels mount to the roof of your RV and collect or harvest sunlight to generate DC electricity. More and larger panels produce more power. They are measured in watts with typical RV solar kits starting at 100 watts to over 400 watts. Consider your electrical usage needs, roof space and budget to determine how many solar panels you require. Mount panels flush to the roof using specialist brackets, rails or adhesive/sealant for safe attachment.
Charge Controller
This device regulates the voltage and current coming from the solar panels before it reaches your RV battery bank. It protects your batteries from overcharging by stopping current flow when they become fully charged. MPPT controllers are most efficient. Size your controller to at least match your solar array wattage. An onboard display lets you monitor performance.
Battery Bank
Deep cycle absorbed glass mat (AGM) batteries safely store the energy produced by your panels, holding power for use when the sun isn’t shining. Your RV may already have an AGM house battery. Determine your electrical needs and size your bank accordingly. 200-400 amp hours is typical for RVs. Linking multiple batteries in parallel increases storage capacity.
Inverter
An inverter takes the DC power from your panels and batteries and converts it into 120V AC power to run RV appliances, electronics and household items like a normal home outlet. Choose a pure sine wave inverter sized to your needs, at least 2000W recommended. Hardwired built-in inverters are most efficient.
This essential gear works together to collect, store and deliver solar electricity. Carefully choose each component to construct your optimal RV solar system.
How to Install an RV Solar Power System
Performing a proper installation of solar panels and related gear on your RV roof involves careful planning and execution. Follow these in-depth steps:
Planning the Installation
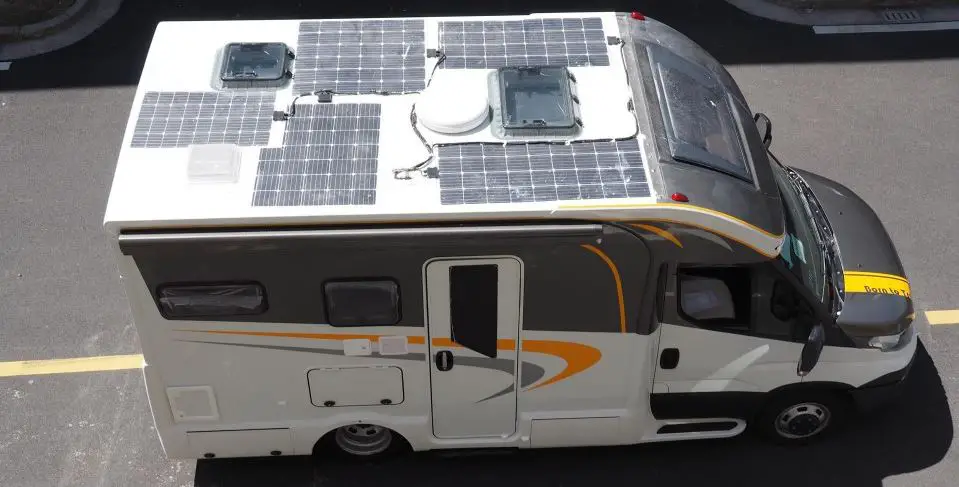
Thoroughly measure the total roof area on your particular RV or trailer model. Consider the angles, contours and obstructions. This helps determine the ideal overall solar panel layout and position for maximum sunlight exposure.
Make sure to leave ample room between panels and around edges for secure attachments and allowing access. Avoid placing panels over vents which could cause heat buildup.
Calculate your typical daily electrical usage needs. Factor in everything you want to power like lights, fridge, water pump, entertainment and electronics. This total wattage helps properly size the solar panels, battery bank capacity and inverter wattage required for your system.
Purchase only high quality solar components designed and rated specifically for RV use. Look for robust, weatherproof panels and mounting equipment that will withstand vibration, moisture, temperature extremes and road conditions. Choose reputable brands.
Obtain all the necessary mounting hardware, wiring, fuses, connectors, conduit and tools for installation. Using copper wiring instead of aluminum provides maximum efficiency and safety.
Develop a detailed electrical diagram of your planned system layout. Sketch panels positioning on the roof and interior equipment locations. Map out all electrical connections from panels to controller to batteries to inverter. This helps tremendously when wiring.
Physical Installation
Clean roof surface thoroughly and apply a primer if needed to ready the area for install. Cover any vulnerable roof components like vents or seals to protect from damage or debris.
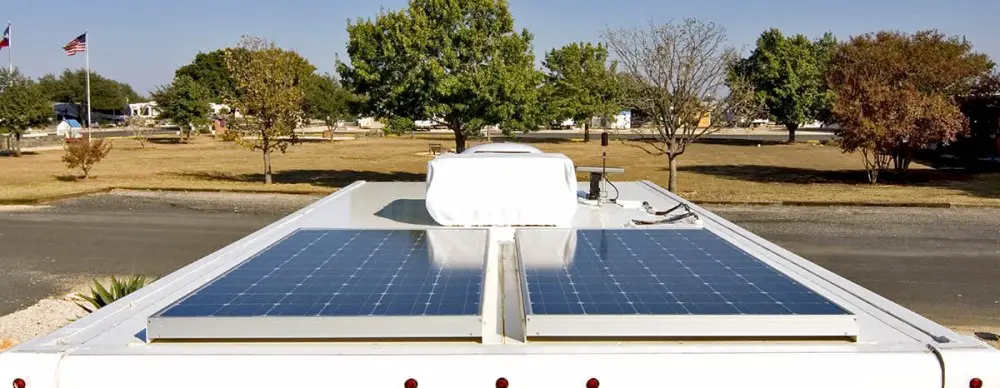
Mount the solar panel frames or rails to the roof using lag screws anchored firmly into roof blocking or rafters according to manufacturer specifications. Proper support is critical.
Carefully attach the solar panels to the mounting system using stainless steel hardware to avoid corrosion. Follow torque specs when tightening bolts to prevent overtightening.
Run the wiring from the panels through flexible conduit properly secured along its path, then route into the RV interior through adequate ports in compliance with electrical codes for your region.
Connect the panels either in series or parallel via a combiner box depending on your system design. Make sure to fuse all circuits for overload protection per guidelines.
Clearly label wiring ends and terminate connections to attach incoming leads to the charge controller, batteries and inverter using copper lugs or connectors suitable for each device.
Testing the Installation
Seal any roof penetrations thoroughly using RV approved sealants compatible with your roof material to prevent moisture leakage. Check for leaks during first rain. Reseal if needed.
Verify all electrical connections are tight, secure and weatherproof. Check wiring for correct polarity, continuity and do resistance tests for potential faults.
Activate the system and inspect for proper operation of the charge controller. Check performance against manufacturer benchmarks. Monitor voltage and amperage daily to gauge solar input.
Test that the inverter successfully outputs the expected 120V AC power from the batteries by plugging in appliances to outlets fed by the inverter.
Start recharging the battery bank! Continually monitor system and battery voltages each day and watch for the full recharge cycle completion.
Conduct overall system checks and troubleshoot any issues until all components are functioning optimally before taking your RV on the road. A good shake down is key.
Meticulous planning, optimal component selection and safe installation practices will ensure your new solar power system performs exactly as intended for many years and miles of reliable off-grid power generation.
Maintaining Your RV Solar Power System
Once your solar panels and equipment are installed and setup, following regular maintenance best practices is key to keeping your system running efficiently for many years:
Monthly, thoroughly inspect wiring connections from the solar panels down to system components for any loose, damaged or corroded terminals. Tighten any loose connections and clean oxidation or corrosion buildup. Check wiring insulation for cracks. Also examine runs for potential rodent damage from chewing and nibbling behavior.
Frequently check your charge controller settings, update to any new software or firmware versions when available, and monitor performance data like daily amperage to ensure it is optimizing solar input to properly charge your battery bank. Most controllers displayuseful metrics and error codes.
When dust, dirt, bird droppings or other debris accumulate, wash the solar panels using soft brushes, mild pH neutral soaps and clean water. Avoid using abrasive brushes or cleaners which could scratch the glass and reduce efficiency. For rooftop panels, use extreme caution when working at heights.
Examine sealants and attachments securing the solar panels and any roof penetrations frequently. Look for any gaps or signs of premature deterioration. Reseal with RV appropriate sealants if needed to avoid roof leaks or loosening components. Monitor roof for leaks after heavy rains.
To prevent sulfate crystal buildup on the lead plates which reduces performance, equalize flooded lead-acid batteries regularly by following manufacturer guidelines for your model, usually every 30-60 days. This applies a controlled overcharge to dissolve sulfation.
Frequently check battery bank water/electrolyte levels in lead-acid batteries and top up using only distilled or deionized water as needed. Low electrolyte exposes plates to air damaging the batteries. Most AGM batteries are sealed and maintenance-free.
Annually load test and inspect each individual battery using a hydrometer to check for failures or inadequate storage capacity as batteries age. Compare hydrometer readings across the bank for inconsistencies. Proactively replace aging batteries.
Monitor your electrical usage and loads routinely. Add more solar panels over time if needed to increase your power generation capabilities. This preserves your battery life by preventing excessive discharge cycles.
Have a qualified solar technology professional perform a thorough inspection, maintenance and diagnostic check of your entire system at least annually. This helps spot and address any problems proactively.
Staying diligent and performing these simple maintenance tasks routinely will maximize performance and extend the lifespan of your RV solar power system for the long run.
Troubleshooting Common Issues
If your RV solar setup suffers problems, here are some troubleshooting tips for likely issues:
Low Power Output
If your panels don’t seem to be generating expected power:
- Battery bank may be fully charged. Monitor voltage. Suspend charging if spiking.
- Check controller for error codes or improper settings. Reset if needed.
- Inspect wiring for loose, corroded or damaged connections reducing current flow.
- Solar panels may be dirty, shaded or improperly aligned. Clean and adjust angle toward sun.
- Test open circuit panel voltage. Compare output vs specs. Inspect for damage.
- Check fuses and breakers. Inspect charge controller, isolator and inverter for outages.
Battery Bank Draining Too Quickly
If your batteries are discharging rapidly or not holding full charges:
- Inspect battery terminals and wiring for loose and corroded connections. Clean and tighten.
- Load test individual batteries for failures using hydrometer. Replace bad batteries.
- Check electrical usage and reduce unnecessary loads. Install power meter to identify drains.
- Consider adding more solar panels and/or upgrading to lithium batteries for increased capacity.
- Ensure batteries are properly winterized if camping in sub-freezing temps. Damaged batteries won’t hold charge.
- Rule out parasitic drains from installed accessories or RV electrical faults draining batteries.
With solar systems, most issues can be solved by carefully inspecting connections, components, and monitoring performance. Seek help from a solar professional for complex electrical problems.
Cost and Return on Investment
Installing a solar power system requires considerable initial investment but pays off substantially over time. Approximate costs for RV solar gear:
- 100W Solar Panel – $150
- Solar Charge Controller – $60
- 2000W Inverter – $200
- 100Ah AGM Battery – $150
- Wiring, fuses, connectors – $50
- Mounts and hardware – $100
For a basic 300 watt system with single battery and assuming professional installation, expect to invest $1500-$2000 upfront. However this system should provide free electricity and pay for itself in 5-7 years when factoring the costs of:
- Campground shore power hookup fees of $15-$50 per night
- Generator fuel at $3-$5 per hour of use
- Replacing outdated lead-acid batteries every 3-5 years
Additionally, with solar you can camp in remote areas and boondock for free indefinitely! So the long term savings solar power provides can be substantial.
Solar power empowers RV owners to gain energy independence and camp longer off-grid by generating their own free renewable electricity during the day. Once you make the initial investment, you’ll enjoy a good return on your solar system for the lifetime of your RV or trailer. Ultimately solar liberates you to roam further for less while reducing environmental impact. The sun provides all the power you need when your adventure vehicle is also your power plant!
Conclusion
Upgrading your RV or trailer with solar panels lets you harness the free, abundant power of the sun to run appliances and electronics silently off-grid. This solar power guide covered the key components like solar panels, charge controllers and inverters that comprise a complete system. We discussed proper installation, maintenance and troubleshooting tips so your solar setup operates reliably for the long run. While solar power represents an upfront cost, it soon pays for itself in energy savings and extended off-grid camping capabilities. If you’re ready to gain energy independence and pursue adventures further afield, then it’s time to unlock the benefits of solar power for your RV lifestyle!
Frequently Asked Questions
What is the cost of solar panels for an RV?
The cost for RV solar panels ranges from $100-$400 per 100 watt panel. Budget $1000-$3000 for a typical 300-500 watt system. High efficiency panels cost more. Prices vary based on brands, wattage, and panel type.
How can I connect solar panels to my RV batteries?
Use a solar charge controller to connect panels to batteries. The controller regulates charging to prevent overcharging. Wire the panels into the controller, and from the controller to the batteries. Fuses should be added for safety.
What are the best portable solar panels for an RV?
Some top portable solar panels are Zamp, HQST, Renogy, AcoPower and Jackery. Look for monocrystalline panels that are compact, lightweight and come with kickstands and suitcase designs for easy transport. Power outputs range from 50-300 watts.
Where can I find RV solar panel installation services?
Some options for professional RV solar installation include RV dealerships, mobile RV technicians, solar energy companies, and RV repair shops. Check reviews and inspect examples of previous RV solar projects when selecting an installer.
What is the best RV solar panel system?
A flexible, modular solar system that allows for expansion is ideal. Look for components like: panels rated for mobile use, MPPT charge controller, lithium batteries, 2000+ watt inverter, and mobile monitoring. Customize to fit your power needs.
How many solar panels do I need to power my 30 amp RV?
For a typical 30 amp RV, you’ll need 400-600 watts of solar power capacity, which usually requires 4-6 standard 100 watt panels. More panels may be needed depending on your power usage and battery bank size. A solar analysis is recommended.